There are many materials to create textures on a support and painting over. However, no single method about “How to create textures in a painting”, but there are some basic rules that will help you if you use one or another material. Rules that will get the canvas will not be dismantled with the passage of time and then, your texture, plus the apinting you make over, will continue just fine.
In addition to textures, you can create volumes and even create the exact forms of the model, that is going to be represented, in a kind of low relief that protrudes from the canvas or support.
The variety of materials to create forms and reliefs on the fabrics, or over cardboard and wood supports, is part of artistic creativity, but they also will be limited by the basic rules presented below.

* Reliefs created by Miquel Barceló, reliefs and painting mix teacher. The work is displayed in the Blessed Sacrament Chapel of the Cathedral of Palma. Although not a relief on canvas, shows a good idea to understand how to create a meaningful relief and how to paint over to get the forms.
Logical rules to create textures on a canvas or wood
- Do not use organic materials: Don´t use the materials that can produce molds or can grow with humidity, because life path is opened and never know whether, for example, a small lentil stuck on the canvas will grow thanks to moisture environment. Some materials very dry can be used.
- Absorbent materials: If you want to paint over the glued materials that generate the textures, it should take into account whether the material will absorb the paint. There are plastic materials that repel water paintings, and then, only oil and synthetic painting can cover these materials.
- Do not use simple adhesive tape, taht over time, will take off because the glue is not designed for those tasks.
- Use a good binder, glue, latex, glue or resin that can stick strongly to the support material
- Control the weight of the material that is sticked to the holder and note if the glue or binder is strong enough. If not, it won´t support the weight when the painting is placed vertically. So, many materials that exceed the volume of the support can be dangerous or just fall off.
- The water or oil base.
If you use a water based glue (latex, for example), it can be painted with acrylic on top, and in the final stage (when the base water is completely dry) it could be painted with oil (which is oil based).
If using an oil-based binder, such as waxes and some resins mixed with oils when dissolved, it should not be painted over with water base paintings. Waxes and resins can generate volume and texture themselves, but also can do so if we mix it with materials.
Just do not ever mix oil and water because the result are shapes that break, because both substances repel each other, and over time, they react more to changes in the temperature. - Bolster the painting. You can use staples, tacks and other woodworking ideas to secure very well some materials into the support. In this type of textures or volumes with big reliefs,it´s good to know something about sculpture because it comes into this area of techniques. The bas-relief and the large textures paintings are the union of both arts, painting and sculpture.

Tàpies artwork as a example. The canvas is mounted with materials over the support and it makes some textures that are painted.
Materials to create volumes of low relief in the canvas.
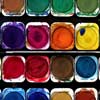
- Pigments, Oleopasto, special materials to create volumes and commercial mastics.
- Salts, sands and soils.
- Pumice dust, small stones or pieces of stones, sea shells, shells of snails or similar, bones, fossils and other elements of the earth.
- Glass and mirrors.
- Paper and cardboard reliefs that are cut into small pieces and glued on with latex backing, generating forms by adding more or less material. Similar to paper mache (paper pulp) but in a way that is attached to a heavy cloth on cardboard or wood.
- All types of fabrics and textures, bits of cotton, yarn, rope and other textiles. You can even sew on canvas these materials.
- Rubber, sponges, hair and plastic materials.
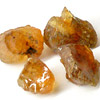
- Wood, roots, bark, sawdust and resins. The seeds, leaves, plants and flowers could be used if dry completely (dead) and then covered completely with the binder (latex, for example) that is isolated and no humidity.
- Wires, nails and other small metals.
Creating volumes with building materials
- Mastics and gessos. Materials are used to fill holes or fix walls but themselves can generate reliefs and stick pretty well to fabrics and wood. With a paddlefish can be applied on the substrate and to create shapes. Once dry can be sanded so they are very thin or mark the reliefs and drawings with a tool such as screwdrivers, scrapers or knives.
- Plaster. Normally, we can create a thin block of plaster and carve in it shapes and volumes. Then you can paint over.
Here are some ideas but I will expand this list as I remember the materials or if any commenter proposes me. Creating textures in the paintings provides a visual element often surprising, because people wants to touch it and it makes a contact, different to the visual only. Often the art work gets more power, or it´s just more beautiful, by the addition of texture, which itself can be beautiful.

THANK YOU FOR THIS. !!!!
Thank you for the information. I want to experiment with some textures and you have given me more than enough to try. This is a very thoughtful, complete article.
Yes. Agree completely.